I made fun of Mac forums in an earlier post, but if you haven't checked out the MacRumors Forums, you should because they have a still-active PowerPC section. Here are a few threads you may find useful:
F.A.Q. for Powerpc Macs
Video on PowerPC - Part 1: Playback on G4/G5
OpenMark results on PowerPC Macs
That last one is a long thread benchmarking graphics cards. Stay out of the flame wars. They could get hairy in there.
Tuesday, March 27, 2012
Monday, March 19, 2012
Installing Debian Linux on PPC Part V - Bugs & Quirks
So now you have your system all up and running, but there are a few things that don't quite work right. If you've installed the Testing branch some bugs are to be expected, but there are other bugs and general quirks in Linux that have been around long before and likely long after.
One bug that qualifies as having been around long before is the infamous disappearing partition bug. Every time you run through the Debian installer, it somehow messes up your Mac OS 9 drivers making any OS 9 partition unbootable. It was a nasty surprise for me, but let me take away all the suspense. Simply boot with your Mac OS install CD, launch Drive Setup, highlight your hard drive from the list, and from the Functions menu select Update Driver. Problem solved. You will now be able to boot into OS 9.
Another thing you should know about OS 9, never use the Startup Disk control panel to choose a startup disk (this applies to OS X's Startup Disk system preference, too). It'll mess up yaboot and you won't be able to boot into Linux. If this should happen to you, reset the pram (hold down command + option + p + r keys on startup) and yaboot will be restored.
Dual booting between Linux and OS 9 also has an issue with system clocks. While your Debian system is set to UTC time, your Mac system is set to local time, so though your Linux time may be correct, you Mac clock can be several hours off. Solve this with:
and change
One problem I had in Squeeze which seems to be fixed in Wheezy is screen blanking overriding the media player. In Squeeze I had to run:
to temporarily turn off screen blanking while watching a movie, otherwise the display would turn off every ten minutes if I didn't move the mouse around. Thankfully, this is no longer an issue in Wheezy. In any event, if DPMS is giving you problems, install XScreensaver and its settings will override DPMS.
I mentioned in Part III, video playback on VLC and mplayer is broken on G3s as they were compiled with altivec instructions. The fix is to compile them from the Debian source with the configure option --disable-altivec. The steps are fairly simple. After installing the
Then create a folder to download the source code:
Now change to ~/Source as your current directory and download the source code with
Then:
and:
Once it's done, while still in ~/Source/vlc-2.0.3, do:
When completed, if you launch VLC in the terminal and get the error, "
Then you should have a working VLC. For mplayer, just replace the vlc above with mplayer. Also, for a GUI frontend like smplayer, make sure in preferences to point it to /usr/local/bin/mplayer. (UPDATE: There's a new fork of mplayer called mpv that's available in Jessie. It works out of the box on G3s, so no need to compile.)
Moving on, if you run audio production software and need to run a JACK audio server, you may fail to get a connection with jackd2 (Well, I did, anyway.). In that case you can install jackd1, which should work.
If you have a tray-loading Mac you may find your disc tray inexplicably refuses to open. There's a bug where after the first time you insert a disc and eject it, you'll no longer be able to open the disc tray. Run the following command in a terminal to restore it:
Were you dumb enough (like me) to burn backup DVDs with the OS X application Burn and choose Mac-only as the file format? If so, those discs won't automount on the desktop, so you'll have to mount them manually with:
where hfsplus is the filesystem and your particular device path can be found in your /etc/fstab file. Burning discs from the OS X Finder or in Burn using Mac + PC hybrid format should avoid this problem.
Got a Powerbook and notice the caps lock light doesn't work? Some kind of conflict with mouseemu causes this, so to get your caps light back, uninstall mouseemu and use /etc/sysctl.conf to emulate right and middle click as detailed at the bottom of Part III - Installing the GUI.
When running a minimal system like Openbox, there are some things missing like a built-in clipboard manager. In this case, you may experience the problem of copying something to the clipboard, then quitting the application you copied from, and having its clipboard contents disappear. To see if you have this problem, copy some text in Leafpad or another text editor, then quit and try pasting the text in another application. If nothing shows up, you got it. The solution is to install a clipboard manager like Parcellite and put it in your autostart file.
Finally I should probably remind you there's no force quit button unless you install a panel that has one, but you can just as easily force quit processes in a terminal by entering
And another troubleshooting tip, if your system is broken and you need to boot into Single User Mode to fix it, you can do so by hitting tab at the second yaboot prompt and then typing "Linux single". You'll eventually be prompted for your root password, and when you're done with any repairs you can type "exit" and it'll logout and continue booting to your normal login manager.
I'll leave you with a few links that you might find of interest:
Openbox - Debian Wiki
WiFi/HowToUse - Debian Wiki
PowerPCFAQ - Ubuntu Wiki: A wealth of information here. And Ubuntu is based on Debian, so almost all of it applies.
Ubuntu PowerPC Installation Guide: Ridiculously comprehensive.
SwitchingToUbuntu/FromMacOSX - Community Ubuntu Documentation: A good rundown of software alternatives.
Best Linux Software: Another good rundown of software titles.
Linux on your Apple Mac | iLinux |
Linux MintPPC | fast and slick Linux for PPC computers: The forums here are fairly active.
I'll be updating this post, hopefully with more good news than bad, as time progresses. In the meantime, happy Linuxing!
Part I - Pre-Installation
Part II - Installing the Base System
Part III - Installing the GUI
Part IV - Configuring Stuff
One bug that qualifies as having been around long before is the infamous disappearing partition bug. Every time you run through the Debian installer, it somehow messes up your Mac OS 9 drivers making any OS 9 partition unbootable. It was a nasty surprise for me, but let me take away all the suspense. Simply boot with your Mac OS install CD, launch Drive Setup, highlight your hard drive from the list, and from the Functions menu select Update Driver. Problem solved. You will now be able to boot into OS 9.
Another thing you should know about OS 9, never use the Startup Disk control panel to choose a startup disk (this applies to OS X's Startup Disk system preference, too). It'll mess up yaboot and you won't be able to boot into Linux. If this should happen to you, reset the pram (hold down command + option + p + r keys on startup) and yaboot will be restored.
Dual booting between Linux and OS 9 also has an issue with system clocks. While your Debian system is set to UTC time, your Mac system is set to local time, so though your Linux time may be correct, you Mac clock can be several hours off. Solve this with:
sudo nano /etc/default/rcSand change
UTC=yes to UTC=no. Now when you boot into OS 9, the time should display correctly. Also, if you ever need to change timezones in Debian, you can use:sudo dpkg-reconfigure tzdataOne problem I had in Squeeze which seems to be fixed in Wheezy is screen blanking overriding the media player. In Squeeze I had to run:
xset -dpms s offto temporarily turn off screen blanking while watching a movie, otherwise the display would turn off every ten minutes if I didn't move the mouse around. Thankfully, this is no longer an issue in Wheezy. In any event, if DPMS is giving you problems, install XScreensaver and its settings will override DPMS.
I mentioned in Part III, video playback on VLC and mplayer is broken on G3s as they were compiled with altivec instructions. The fix is to compile them from the Debian source with the configure option --disable-altivec. The steps are fairly simple. After installing the
build-essential development package, run:sudo aptitude build-dep vlcThen create a folder to download the source code:
mkdir ~/SourceNow change to ~/Source as your current directory and download the source code with
apt-get:cd ~/Sourceapt-get source vlcThen:
cd ~/Source/vlc-2.0.3 (or whatever the new folder name happens to be)and:
./configure --disable-altivecOnce it's done, while still in ~/Source/vlc-2.0.3, do:
makesudo make installWhen completed, if you launch VLC in the terminal and get the error, "
vlc: error while loading shared libraries: libvlc.so.5: cannot open shared object file: No such file or directory" the fix that worked for me is detailed here. You simply enter the following three symlink commands:sudo ln -s /usr/local/lib/libvlc* /usr/lib/
sudo ln -s /usr/local/lib/libx264.a /usr/lib/
sudo ln -s /usr/local/lib/vlc /usr/lib/vlcThen you should have a working VLC. For mplayer, just replace the vlc above with mplayer. Also, for a GUI frontend like smplayer, make sure in preferences to point it to /usr/local/bin/mplayer. (UPDATE: There's a new fork of mplayer called mpv that's available in Jessie. It works out of the box on G3s, so no need to compile.)
Moving on, if you run audio production software and need to run a JACK audio server, you may fail to get a connection with jackd2 (Well, I did, anyway.). In that case you can install jackd1, which should work.
If you have a tray-loading Mac you may find your disc tray inexplicably refuses to open. There's a bug where after the first time you insert a disc and eject it, you'll no longer be able to open the disc tray. Run the following command in a terminal to restore it:
eject -i offWere you dumb enough (like me) to burn backup DVDs with the OS X application Burn and choose Mac-only as the file format? If so, those discs won't automount on the desktop, so you'll have to mount them manually with:
sudo mount -t hfsplus /dev/yourdevice /media/cdrom0where hfsplus is the filesystem and your particular device path can be found in your /etc/fstab file. Burning discs from the OS X Finder or in Burn using Mac + PC hybrid format should avoid this problem.
Got a Powerbook and notice the caps lock light doesn't work? Some kind of conflict with mouseemu causes this, so to get your caps light back, uninstall mouseemu and use /etc/sysctl.conf to emulate right and middle click as detailed at the bottom of Part III - Installing the GUI.
When running a minimal system like Openbox, there are some things missing like a built-in clipboard manager. In this case, you may experience the problem of copying something to the clipboard, then quitting the application you copied from, and having its clipboard contents disappear. To see if you have this problem, copy some text in Leafpad or another text editor, then quit and try pasting the text in another application. If nothing shows up, you got it. The solution is to install a clipboard manager like Parcellite and put it in your autostart file.
Finally I should probably remind you there's no force quit button unless you install a panel that has one, but you can just as easily force quit processes in a terminal by entering
killall -s9 process name. Though in the case of Iceweasel, the process name is "firefox-bin". Good to know.And another troubleshooting tip, if your system is broken and you need to boot into Single User Mode to fix it, you can do so by hitting tab at the second yaboot prompt and then typing "Linux single". You'll eventually be prompted for your root password, and when you're done with any repairs you can type "exit" and it'll logout and continue booting to your normal login manager.
I'll leave you with a few links that you might find of interest:
Openbox - Debian Wiki
WiFi/HowToUse - Debian Wiki
PowerPCFAQ - Ubuntu Wiki: A wealth of information here. And Ubuntu is based on Debian, so almost all of it applies.
Ubuntu PowerPC Installation Guide: Ridiculously comprehensive.
SwitchingToUbuntu/FromMacOSX - Community Ubuntu Documentation: A good rundown of software alternatives.
Best Linux Software: Another good rundown of software titles.
Linux on your Apple Mac | iLinux |
Linux MintPPC | fast and slick Linux for PPC computers: The forums here are fairly active.
I'll be updating this post, hopefully with more good news than bad, as time progresses. In the meantime, happy Linuxing!
Part I - Pre-Installation
Part II - Installing the Base System
Part III - Installing the GUI
Part IV - Configuring Stuff
Friday, March 16, 2012
Installing Debian Linux on PPC Part IV - Configuring Stuff
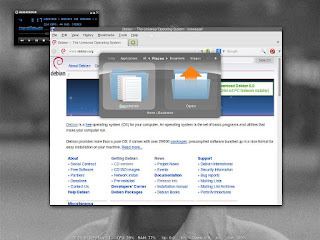
Once you've gotten past the login screen, you will likely be confronted with this as your desktop:

This is Openbox. Now take a minute to let your eyes adjust. I know the visual pizzazz is a bit overwhelming at first. The first thing you may notice is that middle-click brings down a desktop switcher menu and right-click brings down your root menu. The root menu starts off with very few items by default, so the first thing you want to do is add to it. Choose "Terminal emulator" from the root menu, then enter:
Now just play with the editor and save changes. Add a location on the menu, then fill in the text fields for label and execution command (usually the application's name, all lower case). To get a Debian menu with all your applications, you have to install
You can further spruce up your desktop by giving it a wallpaper with Nitrogen and adding
Let's continue.
Sound
Graphics Acceleration
Monitor Calibration
Wireless
Hotkeys
Swap Command and Control Keys
Trackpad
CPU Frequency Scaling
Fstab
Speed Tweaks
Yaboot
Automatic Login
Launchers & Docks
Desktop Icons
Other Desktop Tools
Playing DVDs
Fonts
GTK Themes
Drop Shadows
Autostart on Login
Clean Caches
Sound
If sound isn't working out of the box, try this:
These will install alsamixer among other utilities. Run alsamixer in a terminal window, and if the master volume is muted, use the "m" key to unmute it and the up arrow key to turn it up. You may also need to unmute the headphone or speaker options, though if you have external speakers on a laptop you should turn off the internal speakers by muting "Speaker". Also, if you see a PCM level, turn that up to 75%. I read in an Ubuntu forum that a PCM level above that gives you distortion.
If you're still not getting sound, make sure "snd-powermac" is in your /etc/modules file if you're using an older Mac. Newer PPC Macs like aluminum Powerbooks and G5s use "snd-aoa" and a few other modules. There's more information at Ubuntu's PowerPCFAQ, including fixing a bug that blacklists(!) your snd-aoa modules. If all else fails, try a restart. This actually bailed me out once.
I should also mention PulseAudio. Eventually you may have it installed on your system as a dependency (mine had it from cairo-dock-plug-ins) and experience problems with it. If you're getting stuttering or crackling playback, this is a solution. Also you can often switch from PulseAudio to ALSA playback in an application's preferences, though some don't have that option.
And if alsamixer is showing that PulseAudio is muted after every reboot, you can fix that by installing
Graphics Acceleration
Preamble: If you're getting fast enough desktop performance without acceleration, don't pull your hair out about 3D. I'll leave this section up, though, in case any of you are crazy enough to pursue this :-)
If you have a Radeon card, you need proprietary firmware from the
If you see "OpenGL Render String: Software Rasterizer" you're not getting 3D. Radeon users can do the following: First, turn off the Radeon framebuffer with the yaboot parameter
This will disable suspend on your laptop as I've been told KMS (kernel modesetting) doesn't support suspend on PowerPC "yet." (UPDATE - probably never will)
If this succeeds, you can make it permanent by adding
If, however, you didn't succeed or worse got a black screen, you can downgrade to Mesa-7.1.1 and turn off KMS (Mesa 8 and above doesn't support non-KMS acceleration). Rage 128 users will also want to downgrade as Mesa 8 dropped support for those cards. Downgrade instructions are here under the heading "No userspace mode setting 3d hardware acceleration." And although the packages will say Ubuntu in the filenames, they work on Debian, too. I've tested them.
Once the downgrade is complete, Radeon users can turn off KMS with the yaboot parameter radeon.modeset=0 or by creating the file /etc/modprobe.d/radeon-kms.conf and adding the single line:
If you do have 3D, you can improve performance a bit by playing with xorg.conf options. First you need to generate a xorg.conf file by going into a console with ctl + alt + F1, logging in, and then:
This will terminate your X session (replace lightdm with whatever login manager you're using). Then type:
and then copy the resulting file to its proper location with:
If the xorg.conf.new file was created somewhere else, it'll say where in the Xorg -configure output. Now edit /etc/X11/xorg.conf. I added the following options under the "Device" section:
Then I saved, and when I restarted X with
You may have noticed I've only been talking about ATI cards and not Nvidia. For awhile Nvidia PowerPC drivers were problematic, but I've been told performance on the "nouveau" driver has recently improved and now people are achieving 3D acceleration. Since I don't have any Nvidia systems to test this on, I don't have anything to add, but you can find much more information in the MintPPC forums or perhaps the Ubuntu Apple forum. Good luck!
Monitor Calibration
I've never used hardware calibration, but others report that a Pantone Huey works with Gnome Color Manager. Short of that, there are a few software tools to help you get the right display levels. You can load the .icc files you have in OS X (in /Library/ColorSync/Profiles or ~/Library/ColorSync/Profiles) with the help of
There's also
Wireless
To get your wireless cards working, you need additional firmware. First generation Airport card users need to install
If
You'll want to launch wicd with
If wicd is acting at all flaky here, try a reboot.
If you don't like a graphical solution and are running in a low RAM environment, you can also set up wireless from the command line. It's detailed here under the section "wpa-supplicant." This approach will save you about 15 MB of RAM compared to wicd but is less flexible in switching interfaces on the fly.
Finally, first generation Airport cards only support WPA + TKIP, but not AES (I found this out when I changed my router to use AES encryption). Alas, no WPA2 support, either.
Hotkeys
On laptops, there's the matter of getting hotkeys for brightness, sound volume, and eject to work. Out of the box, my brightness buttons worked with the fn key, but the others needed help. This is where
To edit the pbbuttonsd config file:
Reading it, it should mostly make sense. The LCD_Brightness and Volume lines are commented out by default, so uncomment them if you want those settings to carry over on restart. Also, if sleep on your machine is broken, don't forget to change the suspend options here to prevent sleep.
A few more notes. First, aluminum Powerbook users will need to add i2c-dev to /etc/modules, then reboot to get your keyboard backlight keys working. Second, you can install
And if your hotkeys still won't work and you're about to go insane, try them in conjunction with the fn key.
Swap Command and Control Keys
You can have your command and control keys behave as on a Mac by swapping them. Create the file .Xmodmap (don't forget the dot) in your home directory with:
and add the following text:
After you save it, run the command:
to test. Ubuntu-centric sites say you only have to logout and login again to save the new settings, but in Openbox I found I had to enter the above command in my autostart file (see Autostart on Login below). Also, this will only work in an X session. If you switch to a console, your keys will revert.
Trackpad
To change the tap-to-click setting on your trackpad, you can use, ironically enough, the
Replace the
and enter these two lines in the new file:
After saving it, you make it executable like this:
and then add it to your boot scripts with:
You may see a warning about missing LSB information and overrides, but you can ignore it. See this Debian article about removing the script if you no longer want it.
Also, trackpads on later iBooks and Powerbooks can add multi-touch gestures by setting up the "Synaptics" driver. I wrote a post on this for an Aluminum Powerbook.
CPU Frequency Scaling
For x86 users, CPU frequency scaling is handled by the kernel, but PowerPC users need to install
You can see it working by running:
to display your current CPU frequency, and:
to list available frequencies.
Fstab
Now let's edit our fstab file to auto-mount our Mac partitions on startup. First you need to create mount points like this:
These commands create new directories in the /mnt directory called MacOS and Media. You can name yours whatever you want, but this is what I have. Then open your fstab file with:
and add new lines at the end, for each partition you want to mount. In my case, this:
Put tabs between all the entries, not spaces. You can look up your own partition numbers by running
If that still won't work you may need to run fsck.hfsplus, so unmount the volume (
and then remount with the "rw" and "user" options. One last note, you can write to a journaled OS X volume with the "force" option, not that it's a good idea.
Speed Tweaks
There are a few speed tweaks you can use to improve application responsiveness. First, as mentioned in Part II - Installing the Base System, you should use the noatime option. It should be in your /etc/fstab file as one of the options on your Linux partition. If it's not there, add it. Not doing so will make your hard drive perform slower than it should. Also, there are a couple of things you can add to your /etc/sysctl.conf file. Open it as sudo with nano or your usual text editor and add the following two lines at the bottom:
The default values are 60 and 100, respectively. Changing them will make your system less likely to swap to disk until it really needs to. I've seen some people recommend a swappiness value of 10 for desktop users, others say 20. If you're running a server, you should probably stick with the defaults, but desktop users will definitely want to lower them.
Yaboot
To configure boot options and set which system is the default, you need to backup and then edit /etc/yaboot.conf:
Then find the main section with options like "timeout" and "enablecdboot". If you're dual booting OS 9 and you don't see macos= (or macosx= for OS X), then add it yourself with the line:
With yourmacpartition found with
for the changes to stick. Run that and you're done.
Automatic Login
If LightDM is your login manager, you can set automatic login by editing /etc/lightdm/lightdm.conf and uncommenting (removing the #) the lines:
and adding your username to the top line. Needless to say this creates a massive security hole if anybody steals your computer, so...
Launchers & Docks
If right-clicking the desktop to bring down a root menu with applications isn't your thing, you can add a Quicksilver-like capability with Synapse. Just like Quicksilver, it's an application launcher that does much more, like find and open files, web pages, etc (if the "Startup on login" preference doesn't work for you, you can add
As far as docks go, you can easily configure LXPanel to resemble a 2d, transparent dock like Tiger's. For a more 3D-looking dock with too many options to mention, there's Cairo-dock, a Leopard-like dock with tons of add-ons. I wrote more about it on this post.
Desktop Icons
If you want to go further in achieving a more Mac-like interface, you can add icons to your desktop. You can do this either through PCManFM, Nautilus, or xfdesktop (in the future to be handled natively within Thunar). Full instructions are on this Crunchbang wiki page. If you do this with PCManFM, be aware that xcompmgr + conky doesn't play well with it, specifically with shadows persisting around the conky window. Also, though PCManFM gives you the option of retaining your Openbox right and middle click desktop menus, Nautilus and xfdesktop will replace them with their own.
Other Desktop Tools
So you probably want a few more desktop tools, starting with a system monitor. The best choice is Conky. It's very configurable and you can download other people's conkyrc files to tinker with (link to mine at the bottom of this post). Just be aware the commonly-used battery monitor syntax is Intel only, but I posted the solution for PowerPC users.
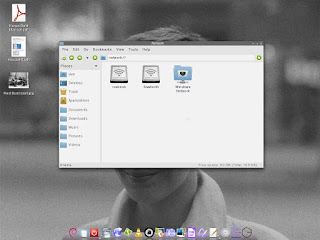
You don't have Spotlight on your new desktop, but you can get much the same functionality with Catfish and Searchmonkey. Catfish is a frontend for the locate and find commands and also integrates with Thunar. Searchmonkey is a frontend for find and grep, though if you're a dedicated nerd I suppose you could use all these commands from the command line :)
Another feature OS X users are familiar with is the ability to right click on a word and have it bring down a dictionary option. You can install Artha to have this same feature in Linux. Simply make it a startup item, and it will run in the background. Just make sure to dismiss a window with close and not the quit button, because quit will actually quit it.
Playing DVDs
If you want to play commercial DVDs that are copy protected, you need to install
and add the single line:
Then:
You may notice a
and then:
Ignore the scary language about untrusted packages and complete the install. Afterward, I just want to stick with official Debian releases for my multimedia applications and don't want to get caught in dependency hell between Deb-Multimedia repositories and official repositories, so I'm going to comment out (add a "#" sign at the beginning of the line) the Deb-Multimedia repository in my sources.list and
Fonts
You can make your fonts look nicer, especially in a web browser, by creating a ".fonts.conf" file. First, in your home folder:
to create the file (don't forget the dot in front of the file name, this will make it hidden). Then you want to open the file in a text editor and paste the following inside it:
GTK Themes
If you've noticed GTK3 applications like Transmission and Abiword aren't following the theming you set in LXAppearance, it's because GTK3 applications aren't compatible with GTK2-only themes. To make everything consistent, you have to choose a theme that is available for both GTK2 and GTK3. Zukitwo is one such choice. Make sure you have its required engines installed, then download it and unpack it to your ~/.themes folder and fire up LXAppearance and set the theme. This should automatically insert a gtk-3.0 folder inside ~/.config, but if it doesn't you can add it manually like this (single line):
Now your theme will be consistent across all GTK2 and GTK3 applications. And a Zukitwo Openbox theme is here, too.
There's also the problem of qt apps like VLC defaulting to the ugly Windows '95 theme, and to fix that you can install
Drop Shadows
Want shadows around your windows and menus? You need
and then add the following lines at the end of your /etc/X11/xorg.conf file (instructions to generate a xorg.conf file are above in the Graphics Acceleration section):
This will add shadows around windows and menus, but not panels or docks, and also adds fading at its fastest setting which can prevent artifacting around certain popups. Press ctrl + c to stop the process, and you can experiment with more settings with
Autostart on Login
In order to have your xcompmgr settings (and any other commands) autostart on login you must add them to an autostart file. Openbox's system-wide autostart file is /etc/xdg/openbox/autostart, but your user autostart is ~/.config/openbox/autostart (in older versions it was autostart.sh, but now it's just autostart). If it's not already there, create it with:
with a dot before config, and add your text. Mine looks like this:
Always add an & to the end of every command in this file. Otherwise, programs after it may not run.
Clean Caches
One last thing to do, if you have limited disk space, is to clear your aptitude cache. All .deb packages you download are stored there enabling you to reinstall something without re-downloading it, but they're not essential so you can clear the cache with:
And with that, my to-do list is pretty much exhausted. Here's a few screenshots, the first of Openbox's root menu with an applications menu added, and also Conky at the bottom of the screen:

Here's the Synapse launcher in the foreground with Iceweasel and Audacious in the background:
And here's a more Mac-like interface with PCManFM drawing icons on the desktop and Cairo-dock on the bottom:
My GTK theme is FlatStudioLight and my Openbox theme is EasyGray, both slightly modded. And the icons are Meliae SVG (requires librsvg2-2). If you're interested, here's my conkyrc file.
Next is the final part of this series, "Bugs & Quirks".
Part I - Pre-Installation
Part II - Installing the Base System
Part III - Installing the GUI
Part V - Bugs & Quirks

This is Openbox. Now take a minute to let your eyes adjust. I know the visual pizzazz is a bit overwhelming at first. The first thing you may notice is that middle-click brings down a desktop switcher menu and right-click brings down your root menu. The root menu starts off with very few items by default, so the first thing you want to do is add to it. Choose "Terminal emulator" from the root menu, then enter:
obmenuNow just play with the editor and save changes. Add a location on the menu, then fill in the text fields for label and execution command (usually the application's name, all lower case). To get a Debian menu with all your applications, you have to install
menu-xdg and then select "Reconfigure" from the root menu. Also, here's a nice video tutorial for adding a dynamic applications menu with icons (build-essential required). For further creativity, you can add shortcuts for sleep, restart, shutdown, and logout. Instructions for that are here under "1. Shutdown and reboot with administrative privileges," though it lacks the logout option, which in Openbox is sudo openbox --exit. Check out that whole guide while you're at it. It's sort of information central for Openbox and it's really great.You can further spruce up your desktop by giving it a wallpaper with Nitrogen and adding
nitrogen --restore & to your autostart file (see Autostart on Login below). You probably also want to manage your themes, fonts, and icons, and for that you can run LXAppearance. You still may notice some things missing, like a taskbar, dock, and desktop icons. And that's part of the beauty of Openbox. You can add all those yourself, like your own favorite taskbar instead of the one handed to you by the Desktop Environment Gods. Or in low memory configurations, you can stick with the root menu, desktop switcher, and Openbox's Exposé-like keyboard shortcuts, because when push comes to shove that's really all you need.Let's continue.
Sound
Graphics Acceleration
Monitor Calibration
Wireless
Hotkeys
Swap Command and Control Keys
Trackpad
CPU Frequency Scaling
Fstab
Speed Tweaks
Yaboot
Automatic Login
Launchers & Docks
Desktop Icons
Other Desktop Tools
Playing DVDs
Fonts
GTK Themes
Drop Shadows
Autostart on Login
Clean Caches
Sound
If sound isn't working out of the box, try this:
sudo aptitude install alsa-base alsa-utilsThese will install alsamixer among other utilities. Run alsamixer in a terminal window, and if the master volume is muted, use the "m" key to unmute it and the up arrow key to turn it up. You may also need to unmute the headphone or speaker options, though if you have external speakers on a laptop you should turn off the internal speakers by muting "Speaker". Also, if you see a PCM level, turn that up to 75%. I read in an Ubuntu forum that a PCM level above that gives you distortion.
If you're still not getting sound, make sure "snd-powermac" is in your /etc/modules file if you're using an older Mac. Newer PPC Macs like aluminum Powerbooks and G5s use "snd-aoa" and a few other modules. There's more information at Ubuntu's PowerPCFAQ, including fixing a bug that blacklists(!) your snd-aoa modules. If all else fails, try a restart. This actually bailed me out once.
I should also mention PulseAudio. Eventually you may have it installed on your system as a dependency (mine had it from cairo-dock-plug-ins) and experience problems with it. If you're getting stuttering or crackling playback, this is a solution. Also you can often switch from PulseAudio to ALSA playback in an application's preferences, though some don't have that option.
And if alsamixer is showing that PulseAudio is muted after every reboot, you can fix that by installing
pavucontrol (a gtk volume control app) and unclicking the mute button under Output Devices.Graphics Acceleration
Preamble: If you're getting fast enough desktop performance without acceleration, don't pull your hair out about 3D. I'll leave this section up, though, in case any of you are crazy enough to pursue this :-)
If you have a Radeon card, you need proprietary firmware from the
firmware-linux-nonfree package, so make sure you installed it. Then to check if you have graphics acceleration, install mesa-utils and run:glxinfo | grep renderIf you see "OpenGL Render String: Software Rasterizer" you're not getting 3D. Radeon users can do the following: First, turn off the Radeon framebuffer with the yaboot parameter
video=radeonfb:off (i.e., at the second yaboot screen, press tab and then type Linux and whatever parameters you are adding). You might also have to turn off the open firmware framebuffer and force PCI mode, like this (single line):Linux video=radeonfb:off video=offb:off radeon.agpmode=-1This will disable suspend on your laptop as I've been told KMS (kernel modesetting) doesn't support suspend on PowerPC "yet." (UPDATE - probably never will)
If this succeeds, you can make it permanent by adding
append="video=radeonfb:off" (and any other parameters inside the quotes and separated by spaces) to your /etc/yaboot.conf file under the section "image=/boot/vmlinux" and tabbed in with the other sub-entries. Then run sudo ybin -v after saving changes.If, however, you didn't succeed or worse got a black screen, you can downgrade to Mesa-7.1.1 and turn off KMS (Mesa 8 and above doesn't support non-KMS acceleration). Rage 128 users will also want to downgrade as Mesa 8 dropped support for those cards. Downgrade instructions are here under the heading "No userspace mode setting 3d hardware acceleration." And although the packages will say Ubuntu in the filenames, they work on Debian, too. I've tested them.
Once the downgrade is complete, Radeon users can turn off KMS with the yaboot parameter radeon.modeset=0 or by creating the file /etc/modprobe.d/radeon-kms.conf and adding the single line:
options radeon modeset=0If you do have 3D, you can improve performance a bit by playing with xorg.conf options. First you need to generate a xorg.conf file by going into a console with ctl + alt + F1, logging in, and then:
sudo /etc/init.d/lightdm stopThis will terminate your X session (replace lightdm with whatever login manager you're using). Then type:
sudo Xorg -configureand then copy the resulting file to its proper location with:
sudo cp /root/xorg.conf.new /etc/X11/xorg.confIf the xorg.conf.new file was created somewhere else, it'll say where in the Xorg -configure output. Now edit /etc/X11/xorg.conf. I added the following options under the "Device" section:
Option "AGPFastWrite" "True"
Option "EnablePageFlip" "True"
Then I saved, and when I restarted X with
startx, I had a decent bump in my glxgears count. One more thing, try installing and launching driconf and click yes where it says "Use HyperZ to boost performance." You should see another glxgears bump :)You may have noticed I've only been talking about ATI cards and not Nvidia. For awhile Nvidia PowerPC drivers were problematic, but I've been told performance on the "nouveau" driver has recently improved and now people are achieving 3D acceleration. Since I don't have any Nvidia systems to test this on, I don't have anything to add, but you can find much more information in the MintPPC forums or perhaps the Ubuntu Apple forum. Good luck!
Monitor Calibration
I've never used hardware calibration, but others report that a Pantone Huey works with Gnome Color Manager. Short of that, there are a few software tools to help you get the right display levels. You can load the .icc files you have in OS X (in /Library/ColorSync/Profiles or ~/Library/ColorSync/Profiles) with the help of
xcalib. If your iMac or 'Book monitor looks too cool, you can use Redshift with the -O arg to warm the color temperature from the default 6500, like:redshift -O 6200There's also
xgamma for adjusting gamma settings. Redshift and xgamma commands can be put in your autostart file to load on login (see Autostart on Login below).Wireless
To get your wireless cards working, you need additional firmware. First generation Airport card users need to install
firmware-linux-nonfree, while Airport Extreme users need firmware-b43-installer. There's also firmware-b43legacy-installer, but I'm not clear which cards, if any, require that.If
wireless-tools and wpasupplicant aren't already installed, do that, too. Then install wicd, a simple graphical client to set things up. You will also need your wireless interface, which can be found with sudo iwconfig. It'll usually be wlan0 or eth1.You'll want to launch wicd with
wicd-client -n, the -n added if you're in a desktop environment with no notification area. Then in preferences add your wireless interface (as well as your OpenDNS servers I know you're all using 'cause it's good for you). Next, find your network on the list (you may have to click refresh), check the "Automatically connect to this network" box, click the Properties button, check the "Use Encryption" box, choose WPA 1/2 (Passphrase)--please say you're not using WEP--and enter your password. Click OK and you should connect.If wicd is acting at all flaky here, try a reboot.
If you don't like a graphical solution and are running in a low RAM environment, you can also set up wireless from the command line. It's detailed here under the section "wpa-supplicant." This approach will save you about 15 MB of RAM compared to wicd but is less flexible in switching interfaces on the fly.
Finally, first generation Airport cards only support WPA + TKIP, but not AES (I found this out when I changed my router to use AES encryption). Alas, no WPA2 support, either.
Hotkeys
On laptops, there's the matter of getting hotkeys for brightness, sound volume, and eject to work. Out of the box, my brightness buttons worked with the fn key, but the others needed help. This is where
pbbuttonsd comes in. Another option for G4 laptop users is pommed, but I find the pre-installed pbbuttonsd more flexible, plus G3 users will need it as pommed only supports G4s.To edit the pbbuttonsd config file:
sudo nano /etc/pbbuttonsd.confReading it, it should mostly make sense. The LCD_Brightness and Volume lines are commented out by default, so uncomment them if you want those settings to carry over on restart. Also, if sleep on your machine is broken, don't forget to change the suspend options here to prevent sleep.
A few more notes. First, aluminum Powerbook users will need to add i2c-dev to /etc/modules, then reboot to get your keyboard backlight keys working. Second, you can install
laptop-mode-tools to enable pbbuttonsd to spin down your hard drive when on battery, but sometimes the spin down rate is too aggressive and can shorten the lifetime of the drive, so be wary. And third, your screen brightness on reboot or wake from sleep will be determined by the LCD_Brightness setting in pbbuttonsd.conf. Your brightness levels changed by the hotkeys won't be "remembered."And if your hotkeys still won't work and you're about to go insane, try them in conjunction with the fn key.
Swap Command and Control Keys
You can have your command and control keys behave as on a Mac by swapping them. Create the file .Xmodmap (don't forget the dot) in your home directory with:
nano ~/.Xmodmapand add the following text:
remove Mod4 = Super_L
remove Control = Control_L
keysym Control_L = Super_L
keysym Super_L = Control_L
add Mod4 = Super_L
add Control = Control_L
After you save it, run the command:
xmodmap ~/.Xmodmapto test. Ubuntu-centric sites say you only have to logout and login again to save the new settings, but in Openbox I found I had to enter the above command in my autostart file (see Autostart on Login below). Also, this will only work in an X session. If you switch to a console, your keys will revert.
Trackpad
To change the tap-to-click setting on your trackpad, you can use, ironically enough, the
trackpad command. To turn it off:sudo trackpad notapReplace the
notap with tap to turn it on. man trackpad gives you all the options. To have your settings carry over after reboot, you can create a startup script with:sudo nano /etc/init.d/trackpadand enter these two lines in the new file:
#!/bin/sh
trackpad notap
After saving it, you make it executable like this:
sudo chmod +x /etc/init.d/trackpadand then add it to your boot scripts with:
sudo update-rc.d trackpad defaultsYou may see a warning about missing LSB information and overrides, but you can ignore it. See this Debian article about removing the script if you no longer want it.
Also, trackpads on later iBooks and Powerbooks can add multi-touch gestures by setting up the "Synaptics" driver. I wrote a post on this for an Aluminum Powerbook.
CPU Frequency Scaling
For x86 users, CPU frequency scaling is handled by the kernel, but PowerPC users need to install
powernowd for this power-saving feature (extending your laptop's battery or maybe quieting down your MDD). It adjusts to CPU load, so you won't notice any performance slowdowns, and though the defaults work fine, you can edit /etc/default/powernowd to customize. (UPDATE: Debian maintainers removed this from their repositories because..., but reader Eric H pointed me to a powernowd.deb file kept here. You can install by downloading it, cd'ing to its current directory, and running sudo dpkg -i powernowd_1.00-1.1+b1_powerpc.deb)You can see it working by running:
cat /sys/devices/system/cpu/cpu0/cpufreq/scaling_cur_freqto display your current CPU frequency, and:
cat /sys/devices/system/cpu/cpu0/cpufreq/scaling_available_frequenciesto list available frequencies.
Fstab
Now let's edit our fstab file to auto-mount our Mac partitions on startup. First you need to create mount points like this:
sudo mkdir /mnt/MacOS
sudo mkdir /mnt/Media
These commands create new directories in the /mnt directory called MacOS and Media. You can name yours whatever you want, but this is what I have. Then open your fstab file with:
sudo nano /etc/fstaband add new lines at the end, for each partition you want to mount. In my case, this:
/dev/sda10 /mnt/MacOS hfsplus defaults 0 0
/dev/sda11 /mnt/Media hfsplus defaults 0 0
Put tabs between all the entries, not spaces. You can look up your own partition numbers by running
sudo mac-fdisk -l (that's l for list). They're either going to be /dev/hdaN or /dev/sdaN. And if you want read/write access to hfsplus volumes, you need to do a few extra things. First, make sure journaling is turned off on your OS X partition (does not apply to OS 9 partitions). Then install hfsprogs and hfsutils and change "defaults" to "rw,user,defaults" in /etc/fstab for that partition. Finally reboot, or remount the volume if it's already mounted with (on one line):sudo mount -t hfsplus -o remount,rw,user /dev/sdaN /your/mountpointIf that still won't work you may need to run fsck.hfsplus, so unmount the volume (
sudo umount /your/mountpoint), then run:sudo fsck.hfsplus -f /dev/sdaNand then remount with the "rw" and "user" options. One last note, you can write to a journaled OS X volume with the "force" option, not that it's a good idea.
Speed Tweaks
There are a few speed tweaks you can use to improve application responsiveness. First, as mentioned in Part II - Installing the Base System, you should use the noatime option. It should be in your /etc/fstab file as one of the options on your Linux partition. If it's not there, add it. Not doing so will make your hard drive perform slower than it should. Also, there are a couple of things you can add to your /etc/sysctl.conf file. Open it as sudo with nano or your usual text editor and add the following two lines at the bottom:
vm.swappiness=10
vm.vfs_cache_pressure=50
The default values are 60 and 100, respectively. Changing them will make your system less likely to swap to disk until it really needs to. I've seen some people recommend a swappiness value of 10 for desktop users, others say 20. If you're running a server, you should probably stick with the defaults, but desktop users will definitely want to lower them.
Yaboot
To configure boot options and set which system is the default, you need to backup and then edit /etc/yaboot.conf:
sudo cp /etc/yaboot.conf ~/yaboot-bak.conf
sudo nano /etc/yaboot.conf
Then find the main section with options like "timeout" and "enablecdboot". If you're dual booting OS 9 and you don't see macos= (or macosx= for OS X), then add it yourself with the line:
macos=/dev/yourmacpartitionWith yourmacpartition found with
sudo mac-fdisk -l. Subsequently, your MacOS will appear as a boot option alongside Linux. To set the default OS, add the line defaultos=macosx or defaultos=macos. If you add no line, yaboot automatically defaults to Linux. And about timeout, if it's too long you can change the value where increments of 10 equal one second. Finally save the file, and this is important, anytime you make changes to yaboot.conf you must run:sudo ybin -vfor the changes to stick. Run that and you're done.
Automatic Login
If LightDM is your login manager, you can set automatic login by editing /etc/lightdm/lightdm.conf and uncommenting (removing the #) the lines:
#autologin-user=
#autologin-user-timeout=0
and adding your username to the top line. Needless to say this creates a massive security hole if anybody steals your computer, so...
Launchers & Docks
If right-clicking the desktop to bring down a root menu with applications isn't your thing, you can add a Quicksilver-like capability with Synapse. Just like Quicksilver, it's an application launcher that does much more, like find and open files, web pages, etc (if the "Startup on login" preference doesn't work for you, you can add
synapse -s to your autostart file to have it hidden on startup). Kupfer is another similar launcher. And for an ultra-lightweight option, there's dmenu from the suckless-tools package.As far as docks go, you can easily configure LXPanel to resemble a 2d, transparent dock like Tiger's. For a more 3D-looking dock with too many options to mention, there's Cairo-dock, a Leopard-like dock with tons of add-ons. I wrote more about it on this post.
Desktop Icons
If you want to go further in achieving a more Mac-like interface, you can add icons to your desktop. You can do this either through PCManFM, Nautilus, or xfdesktop (in the future to be handled natively within Thunar). Full instructions are on this Crunchbang wiki page. If you do this with PCManFM, be aware that xcompmgr + conky doesn't play well with it, specifically with shadows persisting around the conky window. Also, though PCManFM gives you the option of retaining your Openbox right and middle click desktop menus, Nautilus and xfdesktop will replace them with their own.
Other Desktop Tools
So you probably want a few more desktop tools, starting with a system monitor. The best choice is Conky. It's very configurable and you can download other people's conkyrc files to tinker with (link to mine at the bottom of this post). Just be aware the commonly-used battery monitor syntax is Intel only, but I posted the solution for PowerPC users.
You don't have Spotlight on your new desktop, but you can get much the same functionality with Catfish and Searchmonkey. Catfish is a frontend for the locate and find commands and also integrates with Thunar. Searchmonkey is a frontend for find and grep, though if you're a dedicated nerd I suppose you could use all these commands from the command line :)
Another feature OS X users are familiar with is the ability to right click on a word and have it bring down a dictionary option. You can install Artha to have this same feature in Linux. Simply make it a startup item, and it will run in the background. Just make sure to dismiss a window with close and not the quit button, because quit will actually quit it.
Playing DVDs
If you want to play commercial DVDs that are copy protected, you need to install
libdvdcss2 from the Deb-Multimedia Repository. First you want to add the Deb-Multimedia repository to your sources list with:sudo nano /etc/apt/sources.listand add the single line:
deb http://www.deb-multimedia.org wheezy main non-freeThen:
sudo aptitude updateYou may notice a
NO_PUBKEY warning, because you're missing the mutlimedia keyring, so:sudo aptitude install deb-multimedia-keyringand then:
sudo aptitude install libdvdcss2Ignore the scary language about untrusted packages and complete the install. Afterward, I just want to stick with official Debian releases for my multimedia applications and don't want to get caught in dependency hell between Deb-Multimedia repositories and official repositories, so I'm going to comment out (add a "#" sign at the beginning of the line) the Deb-Multimedia repository in my sources.list and
sudo aptitude update again.Fonts
You can make your fonts look nicer, especially in a web browser, by creating a ".fonts.conf" file. First, in your home folder:
touch .fonts.confto create the file (don't forget the dot in front of the file name, this will make it hidden). Then you want to open the file in a text editor and paste the following inside it:
<?xml version="1.0"?>
<!DOCTYPE fontconfig SYSTEM "fonts.dtd">
<fontconfig>
 <match target="font" >
  <edit mode="assign" name="autohint" >
   <bool>false</bool>
  </edit>
 </match>
 <match target="font" >
  <edit mode="assign" name="hinting" >
   <bool>true</bool>
  </edit>
 </match>
 <match target="font" >
  <edit mode="assign" name="hintstyle" >
   <const>hintslight</const>
  </edit>
 </match>
 <match target="font" >
  <edit mode="assign" name="rgba" >
   <const>rgb</const>
  </edit>
 </match>
 <match target="font" >
  <edit mode="assign" name="antialias" >
   <bool>true</bool>
  </edit>
 </match>
<match target="font">
   <edit mode="assign" name="lcdfilter">
   <const>lcddefault</const>
   </edit>
 </match>
</fontconfig>
GTK Themes
If you've noticed GTK3 applications like Transmission and Abiword aren't following the theming you set in LXAppearance, it's because GTK3 applications aren't compatible with GTK2-only themes. To make everything consistent, you have to choose a theme that is available for both GTK2 and GTK3. Zukitwo is one such choice. Make sure you have its required engines installed, then download it and unpack it to your ~/.themes folder and fire up LXAppearance and set the theme. This should automatically insert a gtk-3.0 folder inside ~/.config, but if it doesn't you can add it manually like this (single line):
sudo cp -r ~/.themes/Zukitwo/gtk-3.0 ~/.config/gtk-3.0Now your theme will be consistent across all GTK2 and GTK3 applications. And a Zukitwo Openbox theme is here, too.
There's also the problem of qt apps like VLC defaulting to the ugly Windows '95 theme, and to fix that you can install
qt4-qtconfig (libgnome2-common also required though it's not an official dependency, see this bug report for more). Its launch command is qtconfig, and you can have it set all your qt apps to follow your GTK+ theme or several other choices.Drop Shadows
Want shadows around your windows and menus? You need
xcompmgr:sudo aptitude install xcompmgrand then add the following lines at the end of your /etc/X11/xorg.conf file (instructions to generate a xorg.conf file are above in the Graphics Acceleration section):
Section "Extensions"
    Option "Composite" "Enable"
EndSectionxcompmgr -cCf -D1This will add shadows around windows and menus, but not panels or docks, and also adds fading at its fastest setting which can prevent artifacting around certain popups. Press ctrl + c to stop the process, and you can experiment with more settings with
xcompmgr --helpAutostart on Login
In order to have your xcompmgr settings (and any other commands) autostart on login you must add them to an autostart file. Openbox's system-wide autostart file is /etc/xdg/openbox/autostart, but your user autostart is ~/.config/openbox/autostart (in older versions it was autostart.sh, but now it's just autostart). If it's not already there, create it with:
nano ~/.config/openbox/autostartwith a dot before config, and add your text. Mine looks like this:
#swap command and control keys
xmodmap ~/.Xmodmap &

#my wallpaper
nitrogen --restore &

#system monitor
conky &

#my xcompmgr settings
xcompmgr -cCf -D1 -t -8 -l -11 -r 8 -o .5 &

#screensaver
xscreensaver -no-splash &

#start synapse hidden
synapse -s &

#delay tint2 to ensure transparency
(sleep 2s && tint2) &
Always add an & to the end of every command in this file. Otherwise, programs after it may not run.
Clean Caches
One last thing to do, if you have limited disk space, is to clear your aptitude cache. All .deb packages you download are stored there enabling you to reinstall something without re-downloading it, but they're not essential so you can clear the cache with:
sudo aptitude cleanAnd with that, my to-do list is pretty much exhausted. Here's a few screenshots, the first of Openbox's root menu with an applications menu added, and also Conky at the bottom of the screen:

Here's the Synapse launcher in the foreground with Iceweasel and Audacious in the background:

And here's a more Mac-like interface with PCManFM drawing icons on the desktop and Cairo-dock on the bottom:

My GTK theme is FlatStudioLight and my Openbox theme is EasyGray, both slightly modded. And the icons are Meliae SVG (requires librsvg2-2). If you're interested, here's my conkyrc file.
Next is the final part of this series, "Bugs & Quirks".
Part I - Pre-Installation
Part II - Installing the Base System
Part III - Installing the GUI
Part V - Bugs & Quirks
Wednesday, March 14, 2012
Installing Debian Linux on PPC Part III - Installing the GUI
By now you should be booted into your new system (if you're dual booting OS 9 and you didn't see a "MacOS" option in yaboot, I'll show how to add it manually in Part IV). You've past the startup dialogues and are staring at a terminal prompt, yourhostname
Here you want to type
We logged in as root because in order to get administrative access through your user account, you have to install the
Aptitude is the installer program we'll be using. Other people may use apt-get, but they're basically the same. Once it's done installing, type
and just below it add the line:
yourusername
Then save changes with ctrl + o (and name it "/etc/sudoers" not "/etc/sudoers.tmp") and exit with ctrl + x, and now you can logout of your root session by typing
At the next prompt, type your username and user password and you should be logged in with sudo capabilities. Incidentally, if you want to take a break here, enter:
and this will shutdown your computer.
But if you're still here, now's the time to install your GUI. I said this would be an Openbox install which is lightweight, so the downloading shouldn't take too long. At a terminal prompt, type on one line:
Let's break this down:
1) Xorg is required as your X window server.
2) LightDM is a brand new login manager for Wheezy (incidentally, if you go without a login manager and just use startx, expect to have problems automounting external devices).
3) Openbox, obconf, and obmenu are required for Openbox.
4) The gnome, murrine, pixbuf, and unico packages install themes and also engines that some third party themes require (though in Jessie gtk3-engines-unico causes some third party themes to crash, so maybe uninstall that).
5) fonts-liberation and fonts-freefont-otf are for extra fonts.
6) LXAppearance manages themes, icons, and fonts.
7) Nitrogen manages wallpapers.
8) And XScreensaver is, as incredible as it may seem, a screensaver.
Enter your password and watch the install happen. Once done, there are a few more things to install. But first you need to edit your apt-sources list by typing:
This is your package source list. You want to add non-free repositories by adding "contrib" and "non-free" to each of the entries like this (single line):
Make sure they all end in
to update your repositories (don't forget that last step!).
Now if you have a first-generation Airport card or an ATI graphics card you can install nonfree firmware, and you also may want to add the Microsoft fonts installer for fonts many web pages use (single line):
The mscorefonts installer will auto-launch and take a minute to install all the fonts.
Now let's install some applications. Since my laptop is going to be used for web surfing, writing, and music/video playing, I'm going to install just a basic set by typing on one line:
1) Iceweasel is Firefox rebranded.
2) Claws Mail is similar to OS X's Mail.app.
3) gFTP is for moving files between Macs on your network.
4) Sabnzbdplus and Transmission (execute command is transmission-gtk, FYI) are for Usenet and BitTorrent.
5) Audacious is a really cool lightweight music player.
6) VLC and Mplayer are video players (G3 users will encounter a bug with the official repository packages--workarounds are in Part V - Bugs & Quirks).
7) Minitube is like MacTubes for Linux (UPDATE: seems broken lately, I wrote about some alternatives here and here).
8) Leafpad is a simple text editor.
9) LibreOffice is for those of us who can't abide by Abiword, and libreoffice-gtk ensures LibreOffice uses your GTK theme.
10) Fotoxx is a lightweight image editor.
11) Shutter is a Skitch replacement.
12) GPicView and QPDFView are for viewing pics and pdfs.
13) Asunder is a CD ripper and encoder, while xfburn is for burning discs.
14) Rox-filer is a lightning fast file manager that I wrote about here (Thunar and PCManFM are more "popular" alternatives).
15) LXTerminal is a close equivalent to OS X's Terminal.app.
16) default-jre installs open-source java (replace jre with jdk if you intend to develop java applications), and icedtea-plugin is a java web plug-in (some people report they need to disable this in Iceweasel because it causes their cpu to jump to 100%).
17) Synaptic is a package manager for those of you who prefer a GUI front end to Aptitude/Apt-get.
Here's as good a place as any to show you a little Aptitude trick. I also want to install an archive manager called File-roller, but when I do it wants to install Nautilus and many other optional dependencies, which I don't want. So to just install File-roller, do (on one line):
and you won't get the whole repository with it.
Once all that's done, there's one more thing you need to do before entering the GUI. If you're using a one-button mouse or a one-button laptop, using Openbox without middle and right click will be a highly unpleasant experience--as in you literally won't be able to do anything except stare at the screen and play with your cursor. Debian now has middle and right-click out of the box with
and add the following three lines at the end (and note there's no forward slash before "dev"):
This will make fn + ctrl and fn + alt your middle and right-click keys. Or if you prefer the enter key (next to the spacebar on a laptop, or on the number pad on an extended keyboard) for right-click, replace 100 with 96. Other common choices are 87 and 88 for F11 and F12, respectively. If any of these keycodes differ on your keyboard, run
to activate them. Also, with this method you should uninstall mouseemu as it will conflict with your new settings:
Now you're all set to enter the GUI, so type
Coming up next, Part IV - Configuring Stuff. Be there or be square!
Part I - Pre-Installation
Part II - Installing the Base System
Part IV - Configuring Stuff
Part V - Bugs & Quirks
login: _Here you want to type
root, then enter your root password. Now you're logged in as root with all the superpowers that comes with it. Don't let it go to your head, though. You'll only be the root user momentarily.We logged in as root because in order to get administrative access through your user account, you have to install the
sudo package first. So at the command prompt, type:aptitude install sudoAptitude is the installer program we'll be using. Other people may use apt-get, but they're basically the same. Once it's done installing, type
visudo at the next prompt and you'll see a text file to edit. Navigate down to the line:root ALL=(ALL:ALL) ALLand just below it add the line:
yourusername
ALL=(ALL:ALL) ALLThen save changes with ctrl + o (and name it "/etc/sudoers" not "/etc/sudoers.tmp") and exit with ctrl + x, and now you can logout of your root session by typing
logout.At the next prompt, type your username and user password and you should be logged in with sudo capabilities. Incidentally, if you want to take a break here, enter:
sudo shutdown now -hand this will shutdown your computer.
But if you're still here, now's the time to install your GUI. I said this would be an Openbox install which is lightweight, so the downloading shouldn't take too long. At a terminal prompt, type on one line:
sudo aptitude install xorg lightdm openbox obconf obmenu gnome-themes gnome-themes-extras gtk2-engines-murrine murrine-themes gtk2-engines-pixbuf gtk3-engines-unico fonts-liberation fonts-freefont-otf lxappearance nitrogen xscreensaverLet's break this down:
1) Xorg is required as your X window server.
2) LightDM is a brand new login manager for Wheezy (incidentally, if you go without a login manager and just use startx, expect to have problems automounting external devices).
3) Openbox, obconf, and obmenu are required for Openbox.
4) The gnome, murrine, pixbuf, and unico packages install themes and also engines that some third party themes require (though in Jessie gtk3-engines-unico causes some third party themes to crash, so maybe uninstall that).
5) fonts-liberation and fonts-freefont-otf are for extra fonts.
6) LXAppearance manages themes, icons, and fonts.
7) Nitrogen manages wallpapers.
8) And XScreensaver is, as incredible as it may seem, a screensaver.
Enter your password and watch the install happen. Once done, there are a few more things to install. But first you need to edit your apt-sources list by typing:
sudo nano /etc/apt/sources.listThis is your package source list. You want to add non-free repositories by adding "contrib" and "non-free" to each of the entries like this (single line):
deb http://ftp.us.debian.org/debian/ wheezy main contrib non-freeMake sure they all end in
main contrib non-free. Then save changes and exit, and run: sudo aptitude updateto update your repositories (don't forget that last step!).
Now if you have a first-generation Airport card or an ATI graphics card you can install nonfree firmware, and you also may want to add the Microsoft fonts installer for fonts many web pages use (single line):
sudo aptitude install firmware-linux-nonfree ttf-mscorefonts-installerThe mscorefonts installer will auto-launch and take a minute to install all the fonts.
Now let's install some applications. Since my laptop is going to be used for web surfing, writing, and music/video playing, I'm going to install just a basic set by typing on one line:
sudo aptitude install iceweasel claws-mail gftp sabnzbdplus transmission audacious vlc mplayer minitube leafpad libreoffice libreoffice-gtk fotoxx shutter gpicview qpdfview asunder xfburn rox-filer lxterminal default-jre icedtea-plugin synaptic1) Iceweasel is Firefox rebranded.
2) Claws Mail is similar to OS X's Mail.app.
3) gFTP is for moving files between Macs on your network.
4) Sabnzbdplus and Transmission (execute command is transmission-gtk, FYI) are for Usenet and BitTorrent.
5) Audacious is a really cool lightweight music player.
6) VLC and Mplayer are video players (G3 users will encounter a bug with the official repository packages--workarounds are in Part V - Bugs & Quirks).
7) Minitube is like MacTubes for Linux (UPDATE: seems broken lately, I wrote about some alternatives here and here).
8) Leafpad is a simple text editor.
9) LibreOffice is for those of us who can't abide by Abiword, and libreoffice-gtk ensures LibreOffice uses your GTK theme.
10) Fotoxx is a lightweight image editor.
11) Shutter is a Skitch replacement.
12) GPicView and QPDFView are for viewing pics and pdfs.
13) Asunder is a CD ripper and encoder, while xfburn is for burning discs.
14) Rox-filer is a lightning fast file manager that I wrote about here (Thunar and PCManFM are more "popular" alternatives).
15) LXTerminal is a close equivalent to OS X's Terminal.app.
16) default-jre installs open-source java (replace jre with jdk if you intend to develop java applications), and icedtea-plugin is a java web plug-in (some people report they need to disable this in Iceweasel because it causes their cpu to jump to 100%).
17) Synaptic is a package manager for those of you who prefer a GUI front end to Aptitude/Apt-get.
Here's as good a place as any to show you a little Aptitude trick. I also want to install an archive manager called File-roller, but when I do it wants to install Nautilus and many other optional dependencies, which I don't want. So to just install File-roller, do (on one line):
sudo aptitude install file-roller --without-recommendsand you won't get the whole repository with it.
Once all that's done, there's one more thing you need to do before entering the GUI. If you're using a one-button mouse or a one-button laptop, using Openbox without middle and right click will be a highly unpleasant experience--as in you literally won't be able to do anything except stare at the screen and play with your cursor. Debian now has middle and right-click out of the box with
mouseemu (as F10 and F11, respectively), but I always used this older method:sudo nano /etc/sysctl.confand add the following three lines at the end (and note there's no forward slash before "dev"):
dev/mac_hid/mouse_button_emulation = 1
dev/mac_hid/mouse_button2_keycode = 97
dev/mac_hid/mouse_button3_keycode = 100
This will make fn + ctrl and fn + alt your middle and right-click keys. Or if you prefer the enter key (next to the spacebar on a laptop, or on the number pad on an extended keyboard) for right-click, replace 100 with 96. Other common choices are 87 and 88 for F11 and F12, respectively. If any of these keycodes differ on your keyboard, run
showkey (though not in a terminal emulator, it must be in a console) and press your keys to display their keycodes. Then after you've saved changes to /etc/sysctl.conf, run:sudo sysctl -p /etc/sysctl.confto activate them. Also, with this method you should uninstall mouseemu as it will conflict with your new settings:
sudo aptitude remove mouseemuNow you're all set to enter the GUI, so type
sudo shutdown now -r to reboot. I hope I didn't forget anything...Coming up next, Part IV - Configuring Stuff. Be there or be square!
Part I - Pre-Installation
Part II - Installing the Base System
Part IV - Configuring Stuff
Part V - Bugs & Quirks
Tuesday, March 13, 2012
Installing Debian Linux on PPC Part II - Installing the Base System
Now that you have your newly burned and scorching hot install disc handy, put it in and boot your Mac holding down the "c" key. If you're installing Wheezy, the first screen has a few rudimentary instructions including how to choose your desktop environment (Gnome, KDE, LXDE, XFCE), but I skipped all that for now and pressed return at the boot prompt. The next few screens are pretty self-explanatary, asking for language and keyboard settings. Just pay attention to the navigation instructions on the bottom of the page showing how to use the tab, spacebar, and enter keys (on an aluminum Powerbook install, it also gave me complaints that I had a non standard CDROM device and prompted me for load modules, but I just kept pressing return at the prompts until the install moved on).
Next, you may be shown a screen that asks if you want to install nonfree firmware. I think this is due to first generation Airport cards needing nonfree firmware installed in order to work, and you need the Airport card to work if you're installing over a wireless connection. However, since I have an ethernet connection, I was able to answer no and move on. I'll set up wireless after I've installed the base system. For more information on this, check Debian's install manual and the section "Loading Missing Firmware".
Now the installer will ask you for your host name. This is what you want your computer to be called, in my case, "icebook". Then it asks for a domain name, which I have no need for so I left it blank. Then it asks for a root password, your full name, username, and user password. Remember your passwords! Then after you choose your time zone, you are taken to the real meat of the installer--the Debian partitioner.
If you're installing a Debian-only system and not dual booting, you can use Guided Partitioning here. But if you're dual booting OS 9 or OS X, you'll want to select Manual Partitioning. When you see the partition table, use the arrow keys to navigate down to your Debian partition (if it already says "Free Space" here, the next couple of steps are unnecessary). Press return and choose "Delete the partition". When you return to the partition table, it should say "Free Space" for the Debian partition. Now you will create the bootloader, swap, and root partitions.
Navigate down to Free Space, press return, then select "Create a new partition". Enter 820 KB for the size, to be created at the beginning of the partition. Then name it "Apple_Bootstrap". Under "Use as:" select "NewWorld boot partition", then set the bootable flag to "On". Then select "Done setting up the partition" and you will see the bootloader partition in your new partition table.
Next, create a swap partition following basically the same procedure. Go down to Free Space, create a new partition, enter the size (at least as much as your physical RAM, I entered 512 MB to be safe), at the beginning of the partition, but under "Use as:" select "swap area". Then select "Done setting up the partition" and see the new partition table.
Finally, begin the same procedure for making your root partition. Go down to Free Space, create new, and for size use the maximum remaining space (unless you're one of those weirdos who uses a separate partition for your home folder /wink). Name it something like "Debian." Under "Use as:" select "Ext4 journaling file system". For mount point, choose "/ - the root file system". For mount options, select "noatime" by ticking it with the spacebar. Change the bootable flag to "On", and then you can select "Done setting up the partition" and see your completed partition table. At this point, if you see a few kilobytes of free space at the end, just ignore it.
Now you can finally choose "Finish partitioning and write changes to disk." Use the tab key to select yes and press return.
This is when the actual installation begins. Here it will install the base system and, after a bit, ask you to enter your country and to select an archive mirror. When it asked for proxy info, I left it blank since I'm not using one. The next question to come up is "Participate in package usage survey?" Answer yes because it's always good to let the mothership know there are PowerPC users out there.
On a subsequent page you will be asked to choose additional software to install. Here you'll notice "Debian desktop environment" is checked by default. This will install whichever desktop environment you chose at the beginning (Gnome by default). Which you could totally do. I'm not judging you, really. But if you want to install Openbox without all the extra cruft, you'll want to uncheck this box by pressing the spacebar. You can always install Gnome later if you insist ;) Just make sure "Standard system utilities", "Print server", and "SSH Server" are checked and also "Laptop" if you're using a laptop, then use the tab key to navigate to "Continue" and press return.
When the installation finally completes, the CD will eject and you can press return to boot into your new system.
Next part, "Installing the GUI". Hope to see you soon!
Part I - Pre-Installation
Part III - Installing the GUI
Part IV - Configuring Stuff
Part V - Bugs & Quirks
Monday, March 12, 2012
Installing Debian Linux on PPC Part I - Pre-Installation
(UPDATED for Wheezy Stable)
I've been meaning to do this for awhile, so I've finally gotten around to giving you my thoroughly complete guide to installing Linux on your old iBook, Powerbook, Mini, or Power Mac. This will be an epic told in five parts: Pre-Installation, Installing the Base System, Installing the GUI, Configuring Stuff, and Bugs & Quirks. There are a few distributions out there that already do much of the work for you--MintPPC, Ubuntu, and Debian's default desktop install. But I thought I'd put up a guide for a more custom install, in this case using Openbox as the desktop environment, for low memory systems or if you just want to build your system from the ground up. But even if you're planning to go with Debian's default desktop or MintPPC, you should still find the info here useful and hopefully it'll save you from some serious hair pulling. So let's get to it!
For this install I will be dual-booting Debian and Mac OS 9 on an iBook G3 with256 now 640 MB of RAM. If you want to dual boot OS X, the same basically applies, and also, though this guide will be laptop-centric, most of the steps here apply to desktops, too.
The first thing you want to do is backup your data because you will be erasing the hard drive in order to repartition it. After you've backed everything up, boot your computer with an OS 9 (or OS X) installation disc by inserting it and pressing the "c" key. Then, find the Utilities folder and run Drive Setup (Disk Utility if you're booting from an OS X disc). Next, select your hard drive from the list and click "Initialize...", then click "Custom Setup..."
Now, how many partitions do you want? At least two, but I'm choosing three, one for Debian, one for Mac OS 9, and one as a sharing partition (if you only intend to install Debian alone, you can just set up one partition). The reason for three? Though your Mac partitions are visible in Linux, your Linux partition is not in OS 9. So I like to have a shared partition that I can use to access my media files from both systems. Also, OS X's journaled filesystem will only mount as read-only in Linux, and mounting Linux partitions in the OS X Finder can be a pain, so again, you may prefer having a shared partition easily writable between both systems (somewhat related, there's a tutorial on sharing the same home folder between Linux and OS X here Scratch that. I noticed there were hidden folders in my OS X home folder that could conflict with hidden Linux folders of the same name. Try this symlinking method instead.).
Back to Drive Setup, I'm choosing three partitions, then choosing their sizes and filesystems. The first (top) partition on the table must be your Debian partition. Choose the size, then choose "Unallocated", or really it doesn't matter which filesystem since you're going to erase this partition later in the Debian installer. Then set the sizes of your OS 9 and shared partitions and choose HFS Plus as their filesystems. OS X users running Disc Utility will want to choose "Mac OS Extended (Journaled)" for their OS X partition and "Mac OS Extended" for any OS 9 or sharing partitions. Also, if you're triple booting OS 9 and OS X, put them on separate partitions. If they're on the same one, they'll need the native Mac startup disk chooser to know which to boot, and that'll conflict with the Linux bootloader.
Once I was done, I had three volumes, one unallocated, one for OS 9, and one for sharing data between systems. From there, I initialized the disk and saw the two HFS Plus partitions show up on my desktop. Now you can install OS 9 (or OS X if that's what you're doing). You must install the Mac OS first, before Debian, because Mac system installers don't play well with Linux systems already on disk. Reboot and check that everything works, and now you can proceed to the one step missing from all this--getting the Debian install disc!
So go over to Debian.org and find an ISO to download. There are three branches to choose from: Stable, Testing, and Sid (unstable). Stable is generally for newbies and servers, Testing is for somewhat experienced desktop users, and Sid is the bleeding edge, may make your system fry choice. Usually I install Testing, but since as of this writing Wheezy just turned stable, there's not much difference yet between the Stable and Testing branches, so I'll stick with Wheezy. My preferred installer is the network install disc. It's about 200 MB and burns to a single disc, and it also requires a network connection. Go to the Network Install page and download the powerpc netinst.iso (the Testing netinst.iso can be found on this page).
The only thing left is to burn the disc. People say to burn it at a slow speed since Linux install discs can be fickle, so when in Rome...
One more note, a longstanding bug in the Debian installer messes up Apple driver partitions and will temporarily make your OS 9 partition unbootable (OS 9 only, doesn't affect OS X partitions). There's a simple fix for this, however, that will be detailed in Part V - Bugs & Quirks.
I'll see you in our next episode, "Installing the Base System".
Part II - Installing the Base System
Part III - Installing the GUI
Part IV - Configuring Stuff
Part V - Bugs & Quirks
I've been meaning to do this for awhile, so I've finally gotten around to giving you my thoroughly complete guide to installing Linux on your old iBook, Powerbook, Mini, or Power Mac. This will be an epic told in five parts: Pre-Installation, Installing the Base System, Installing the GUI, Configuring Stuff, and Bugs & Quirks. There are a few distributions out there that already do much of the work for you--MintPPC, Ubuntu, and Debian's default desktop install. But I thought I'd put up a guide for a more custom install, in this case using Openbox as the desktop environment, for low memory systems or if you just want to build your system from the ground up. But even if you're planning to go with Debian's default desktop or MintPPC, you should still find the info here useful and hopefully it'll save you from some serious hair pulling. So let's get to it!
For this install I will be dual-booting Debian and Mac OS 9 on an iBook G3 with
The first thing you want to do is backup your data because you will be erasing the hard drive in order to repartition it. After you've backed everything up, boot your computer with an OS 9 (or OS X) installation disc by inserting it and pressing the "c" key. Then, find the Utilities folder and run Drive Setup (Disk Utility if you're booting from an OS X disc). Next, select your hard drive from the list and click "Initialize...", then click "Custom Setup..."
Now, how many partitions do you want? At least two, but I'm choosing three, one for Debian, one for Mac OS 9, and one as a sharing partition (if you only intend to install Debian alone, you can just set up one partition). The reason for three? Though your Mac partitions are visible in Linux, your Linux partition is not in OS 9. So I like to have a shared partition that I can use to access my media files from both systems. Also, OS X's journaled filesystem will only mount as read-only in Linux, and mounting Linux partitions in the OS X Finder can be a pain, so again, you may prefer having a shared partition easily writable between both systems (
Back to Drive Setup, I'm choosing three partitions, then choosing their sizes and filesystems. The first (top) partition on the table must be your Debian partition. Choose the size, then choose "Unallocated", or really it doesn't matter which filesystem since you're going to erase this partition later in the Debian installer. Then set the sizes of your OS 9 and shared partitions and choose HFS Plus as their filesystems. OS X users running Disc Utility will want to choose "Mac OS Extended (Journaled)" for their OS X partition and "Mac OS Extended" for any OS 9 or sharing partitions. Also, if you're triple booting OS 9 and OS X, put them on separate partitions. If they're on the same one, they'll need the native Mac startup disk chooser to know which to boot, and that'll conflict with the Linux bootloader.
Once I was done, I had three volumes, one unallocated, one for OS 9, and one for sharing data between systems. From there, I initialized the disk and saw the two HFS Plus partitions show up on my desktop. Now you can install OS 9 (or OS X if that's what you're doing). You must install the Mac OS first, before Debian, because Mac system installers don't play well with Linux systems already on disk. Reboot and check that everything works, and now you can proceed to the one step missing from all this--getting the Debian install disc!
So go over to Debian.org and find an ISO to download. There are three branches to choose from: Stable, Testing, and Sid (unstable). Stable is generally for newbies and servers, Testing is for somewhat experienced desktop users, and Sid is the bleeding edge, may make your system fry choice. Usually I install Testing, but since as of this writing Wheezy just turned stable, there's not much difference yet between the Stable and Testing branches, so I'll stick with Wheezy. My preferred installer is the network install disc. It's about 200 MB and burns to a single disc, and it also requires a network connection. Go to the Network Install page and download the powerpc netinst.iso (the Testing netinst.iso can be found on this page).
The only thing left is to burn the disc. People say to burn it at a slow speed since Linux install discs can be fickle, so when in Rome...
One more note, a longstanding bug in the Debian installer messes up Apple driver partitions and will temporarily make your OS 9 partition unbootable (OS 9 only, doesn't affect OS X partitions). There's a simple fix for this, however, that will be detailed in Part V - Bugs & Quirks.
I'll see you in our next episode, "Installing the Base System".
Part II - Installing the Base System
Part III - Installing the GUI
Part IV - Configuring Stuff
Part V - Bugs & Quirks
Subscribe to:
Comments (Atom)