Now that you have your newly burned and scorching hot install disc handy, put it in and boot your Mac holding down the "c" key. If you're installing Wheezy, the first screen has a few rudimentary instructions including how to choose your desktop environment (Gnome, KDE, LXDE, XFCE), but I skipped all that for now and pressed return at the boot prompt. The next few screens are pretty self-explanatary, asking for language and keyboard settings. Just pay attention to the navigation instructions on the bottom of the page showing how to use the tab, spacebar, and enter keys (on an aluminum Powerbook install, it also gave me complaints that I had a non standard CDROM device and prompted me for load modules, but I just kept pressing return at the prompts until the install moved on).
Next, you may be shown a screen that asks if you want to install nonfree firmware. I think this is due to first generation Airport cards needing nonfree firmware installed in order to work, and you need the Airport card to work if you're installing over a wireless connection. However, since I have an ethernet connection, I was able to answer no and move on. I'll set up wireless after I've installed the base system. For more information on this, check Debian's install manual and the section "Loading Missing Firmware".
Now the installer will ask you for your host name. This is what you want your computer to be called, in my case, "icebook". Then it asks for a domain name, which I have no need for so I left it blank. Then it asks for a root password, your full name, username, and user password. Remember your passwords! Then after you choose your time zone, you are taken to the real meat of the installer--the Debian partitioner.
If you're installing a Debian-only system and not dual booting, you can use Guided Partitioning here. But if you're dual booting OS 9 or OS X, you'll want to select Manual Partitioning. When you see the partition table, use the arrow keys to navigate down to your Debian partition (if it already says "Free Space" here, the next couple of steps are unnecessary). Press return and choose "Delete the partition". When you return to the partition table, it should say "Free Space" for the Debian partition. Now you will create the bootloader, swap, and root partitions.
Navigate down to Free Space, press return, then select "Create a new partition". Enter 820 KB for the size, to be created at the beginning of the partition. Then name it "Apple_Bootstrap". Under "Use as:" select "NewWorld boot partition", then set the bootable flag to "On". Then select "Done setting up the partition" and you will see the bootloader partition in your new partition table.
Next, create a swap partition following basically the same procedure. Go down to Free Space, create a new partition, enter the size (at least as much as your physical RAM, I entered 512 MB to be safe), at the beginning of the partition, but under "Use as:" select "swap area". Then select "Done setting up the partition" and see the new partition table.
Finally, begin the same procedure for making your root partition. Go down to Free Space, create new, and for size use the maximum remaining space (unless you're one of those weirdos who uses a separate partition for your home folder /wink). Name it something like "Debian." Under "Use as:" select "Ext4 journaling file system". For mount point, choose "/ - the root file system". For mount options, select "noatime" by ticking it with the spacebar. Change the bootable flag to "On", and then you can select "Done setting up the partition" and see your completed partition table. At this point, if you see a few kilobytes of free space at the end, just ignore it.
Now you can finally choose "Finish partitioning and write changes to disk." Use the tab key to select yes and press return.
This is when the actual installation begins. Here it will install the base system and, after a bit, ask you to enter your country and to select an archive mirror. When it asked for proxy info, I left it blank since I'm not using one. The next question to come up is "Participate in package usage survey?" Answer yes because it's always good to let the mothership know there are PowerPC users out there.
On a subsequent page you will be asked to choose additional software to install. Here you'll notice "Debian desktop environment" is checked by default. This will install whichever desktop environment you chose at the beginning (Gnome by default). Which you could totally do. I'm not judging you, really. But if you want to install Openbox without all the extra cruft, you'll want to uncheck this box by pressing the spacebar. You can always install Gnome later if you insist ;) Just make sure "Standard system utilities", "Print server", and "SSH Server" are checked and also "Laptop" if you're using a laptop, then use the tab key to navigate to "Continue" and press return.
When the installation finally completes, the CD will eject and you can press return to boot into your new system.
Next part, "Installing the GUI". Hope to see you soon!
Part I - Pre-Installation
Part III - Installing the GUI
Part IV - Configuring Stuff
Part V - Bugs & Quirks
Tuesday, March 13, 2012

Monday, March 12, 2012
Installing Debian Linux on PPC Part I - Pre-Installation
(UPDATED for Wheezy Stable)
I've been meaning to do this for awhile, so I've finally gotten around to giving you my thoroughly complete guide to installing Linux on your old iBook, Powerbook, Mini, or Power Mac. This will be an epic told in five parts: Pre-Installation, Installing the Base System, Installing the GUI, Configuring Stuff, and Bugs & Quirks. There are a few distributions out there that already do much of the work for you--MintPPC, Ubuntu, and Debian's default desktop install. But I thought I'd put up a guide for a more custom install, in this case using Openbox as the desktop environment, for low memory systems or if you just want to build your system from the ground up. But even if you're planning to go with Debian's default desktop or MintPPC, you should still find the info here useful and hopefully it'll save you from some serious hair pulling. So let's get to it!
For this install I will be dual-booting Debian and Mac OS 9 on an iBook G3 with256 now 640 MB of RAM. If you want to dual boot OS X, the same basically applies, and also, though this guide will be laptop-centric, most of the steps here apply to desktops, too.
The first thing you want to do is backup your data because you will be erasing the hard drive in order to repartition it. After you've backed everything up, boot your computer with an OS 9 (or OS X) installation disc by inserting it and pressing the "c" key. Then, find the Utilities folder and run Drive Setup (Disk Utility if you're booting from an OS X disc). Next, select your hard drive from the list and click "Initialize...", then click "Custom Setup..."
Now, how many partitions do you want? At least two, but I'm choosing three, one for Debian, one for Mac OS 9, and one as a sharing partition (if you only intend to install Debian alone, you can just set up one partition). The reason for three? Though your Mac partitions are visible in Linux, your Linux partition is not in OS 9. So I like to have a shared partition that I can use to access my media files from both systems. Also, OS X's journaled filesystem will only mount as read-only in Linux, and mounting Linux partitions in the OS X Finder can be a pain, so again, you may prefer having a shared partition easily writable between both systems (somewhat related, there's a tutorial on sharing the same home folder between Linux and OS X here Scratch that. I noticed there were hidden folders in my OS X home folder that could conflict with hidden Linux folders of the same name. Try this symlinking method instead.).
Back to Drive Setup, I'm choosing three partitions, then choosing their sizes and filesystems. The first (top) partition on the table must be your Debian partition. Choose the size, then choose "Unallocated", or really it doesn't matter which filesystem since you're going to erase this partition later in the Debian installer. Then set the sizes of your OS 9 and shared partitions and choose HFS Plus as their filesystems. OS X users running Disc Utility will want to choose "Mac OS Extended (Journaled)" for their OS X partition and "Mac OS Extended" for any OS 9 or sharing partitions. Also, if you're triple booting OS 9 and OS X, put them on separate partitions. If they're on the same one, they'll need the native Mac startup disk chooser to know which to boot, and that'll conflict with the Linux bootloader.
Once I was done, I had three volumes, one unallocated, one for OS 9, and one for sharing data between systems. From there, I initialized the disk and saw the two HFS Plus partitions show up on my desktop. Now you can install OS 9 (or OS X if that's what you're doing). You must install the Mac OS first, before Debian, because Mac system installers don't play well with Linux systems already on disk. Reboot and check that everything works, and now you can proceed to the one step missing from all this--getting the Debian install disc!
So go over to Debian.org and find an ISO to download. There are three branches to choose from: Stable, Testing, and Sid (unstable). Stable is generally for newbies and servers, Testing is for somewhat experienced desktop users, and Sid is the bleeding edge, may make your system fry choice. Usually I install Testing, but since as of this writing Wheezy just turned stable, there's not much difference yet between the Stable and Testing branches, so I'll stick with Wheezy. My preferred installer is the network install disc. It's about 200 MB and burns to a single disc, and it also requires a network connection. Go to the Network Install page and download the powerpc netinst.iso (the Testing netinst.iso can be found on this page).
The only thing left is to burn the disc. People say to burn it at a slow speed since Linux install discs can be fickle, so when in Rome...
One more note, a longstanding bug in the Debian installer messes up Apple driver partitions and will temporarily make your OS 9 partition unbootable (OS 9 only, doesn't affect OS X partitions). There's a simple fix for this, however, that will be detailed in Part V - Bugs & Quirks.
I'll see you in our next episode, "Installing the Base System".
Part II - Installing the Base System
Part III - Installing the GUI
Part IV - Configuring Stuff
Part V - Bugs & Quirks
I've been meaning to do this for awhile, so I've finally gotten around to giving you my thoroughly complete guide to installing Linux on your old iBook, Powerbook, Mini, or Power Mac. This will be an epic told in five parts: Pre-Installation, Installing the Base System, Installing the GUI, Configuring Stuff, and Bugs & Quirks. There are a few distributions out there that already do much of the work for you--MintPPC, Ubuntu, and Debian's default desktop install. But I thought I'd put up a guide for a more custom install, in this case using Openbox as the desktop environment, for low memory systems or if you just want to build your system from the ground up. But even if you're planning to go with Debian's default desktop or MintPPC, you should still find the info here useful and hopefully it'll save you from some serious hair pulling. So let's get to it!
For this install I will be dual-booting Debian and Mac OS 9 on an iBook G3 with
The first thing you want to do is backup your data because you will be erasing the hard drive in order to repartition it. After you've backed everything up, boot your computer with an OS 9 (or OS X) installation disc by inserting it and pressing the "c" key. Then, find the Utilities folder and run Drive Setup (Disk Utility if you're booting from an OS X disc). Next, select your hard drive from the list and click "Initialize...", then click "Custom Setup..."
Now, how many partitions do you want? At least two, but I'm choosing three, one for Debian, one for Mac OS 9, and one as a sharing partition (if you only intend to install Debian alone, you can just set up one partition). The reason for three? Though your Mac partitions are visible in Linux, your Linux partition is not in OS 9. So I like to have a shared partition that I can use to access my media files from both systems. Also, OS X's journaled filesystem will only mount as read-only in Linux, and mounting Linux partitions in the OS X Finder can be a pain, so again, you may prefer having a shared partition easily writable between both systems (
Back to Drive Setup, I'm choosing three partitions, then choosing their sizes and filesystems. The first (top) partition on the table must be your Debian partition. Choose the size, then choose "Unallocated", or really it doesn't matter which filesystem since you're going to erase this partition later in the Debian installer. Then set the sizes of your OS 9 and shared partitions and choose HFS Plus as their filesystems. OS X users running Disc Utility will want to choose "Mac OS Extended (Journaled)" for their OS X partition and "Mac OS Extended" for any OS 9 or sharing partitions. Also, if you're triple booting OS 9 and OS X, put them on separate partitions. If they're on the same one, they'll need the native Mac startup disk chooser to know which to boot, and that'll conflict with the Linux bootloader.
Once I was done, I had three volumes, one unallocated, one for OS 9, and one for sharing data between systems. From there, I initialized the disk and saw the two HFS Plus partitions show up on my desktop. Now you can install OS 9 (or OS X if that's what you're doing). You must install the Mac OS first, before Debian, because Mac system installers don't play well with Linux systems already on disk. Reboot and check that everything works, and now you can proceed to the one step missing from all this--getting the Debian install disc!
So go over to Debian.org and find an ISO to download. There are three branches to choose from: Stable, Testing, and Sid (unstable). Stable is generally for newbies and servers, Testing is for somewhat experienced desktop users, and Sid is the bleeding edge, may make your system fry choice. Usually I install Testing, but since as of this writing Wheezy just turned stable, there's not much difference yet between the Stable and Testing branches, so I'll stick with Wheezy. My preferred installer is the network install disc. It's about 200 MB and burns to a single disc, and it also requires a network connection. Go to the Network Install page and download the powerpc netinst.iso (the Testing netinst.iso can be found on this page).
The only thing left is to burn the disc. People say to burn it at a slow speed since Linux install discs can be fickle, so when in Rome...
One more note, a longstanding bug in the Debian installer messes up Apple driver partitions and will temporarily make your OS 9 partition unbootable (OS 9 only, doesn't affect OS X partitions). There's a simple fix for this, however, that will be detailed in Part V - Bugs & Quirks.
I'll see you in our next episode, "Installing the Base System".
Part II - Installing the Base System
Part III - Installing the GUI
Part IV - Configuring Stuff
Part V - Bugs & Quirks
Friday, February 17, 2012
A Badge of Our Times
I found this via The Macintosh Garden forums. A German software company has branded their software with a badge, "Full software, not an App!" Quote from their website:
Software products branded with our badge shown above identify applications which are too powerful to be sold on Apple's Mac® App Store℠.Siri? What do I do, Siri? This does not compute!
Such a program is fully featured and does not fall under the restrictions imposed on “Apps”. The design of the application is oriented at user-friendlyness and carefully weighs the demands of professional customers against the skills of home users who are not interested in technical details.
Monday, February 6, 2012
TOR on Tiger
(UPDATE: This post is outdated. Please see this post for more current information.)
Well, it's been an eventful last few weeks on the internet with the shutdown of Megaupload, as well as news that Twitter will censor tweets, the FBI is seeking social network monitoring software, and some university student may be extradited from the UK to the US for hosting links on his website.
With all this going on, I thought it might be a good time to try out TOR, the open source privacy software that anonymises your internet activity from prying governments or anyone else. You may have already heard of it as a way to get around the Great Firewall of China. The bad news for us PowerPC users is the browser bundle TOR offers, a specialized version of Firefox bundled with other utilities that you just start up and run, is Intel only. The good news is they offer a "Vidalia Bundle" without the browser (you configure your preexisting browser) that works on PPC and Tiger here. If you're insane you can also compile it.
Vidalia is the name of the GUI utility to set up TOR on your computer, and it's pretty straightforward. The only glitch I saw was there's no dock icon like they said there'd be, only a menubar icon. Maybe a Tiger bug. The only difficult thing in setup was knowing which proxy settings to change in your web browser,but thankfully that task was taken up by the suitably named SimpleHelp.net with the simplest and easiest explanation you'll ever find (pictures, too!).-->OUTDATED: go here instead. You can also look here to find instructions on how to set your proxy system wide. Then it's a matter of going to their test page (alternate test page here) and seeing if you're now anonymous.
I thought performance was pretty good. I'd heard the TOR network was slow as a snail, but that wasn't my experience. Web surfing was a little sluggish, but not too much. Now, it's important to note here that the TOR network does have its limitations. It wasn't made for filesharing, so using it to download torrents is considered a douche move that only slows the network for others. If you want to download TV shows or whatever anonymously, use torrents with a VPN or get a usenet account with SSL support, but let's leave TOR to non-filesharing activities like leaking sensitive documents, mmkay?
On a semi-related note, there's a program out in the wild called Reaver that uses a WPS vulnerability in your wireless router to snatch your WPA and WPA2 passwords. This is not a privacy enhancing program. The solution is to disable WPS in your router, but on many if not all Linksys and Cisco routers, you can't do it. And Netgear users report problems, too. So ultimately you'll have to replace your manufacturer's firmware with open source firmware like DD-WRT which doesn't support WPS.
That was mildly depressing.
UPDATE: TOR developers have reported a previously unknown security vulnerability that could expose your IP address if you use websocket connections in Firefox. They've updated their browser bundles with a bugfix, but not the Vidalia bundle for PPC. I couldn't figure out if the bug applies to just the browser bundle users or to all others who are using external browsers (puzzlingly, TOR has no support forums), so I guess the safest thing is to disable websockets in TenFourFox by changing
Well, it's been an eventful last few weeks on the internet with the shutdown of Megaupload, as well as news that Twitter will censor tweets, the FBI is seeking social network monitoring software, and some university student may be extradited from the UK to the US for hosting links on his website.
With all this going on, I thought it might be a good time to try out TOR, the open source privacy software that anonymises your internet activity from prying governments or anyone else. You may have already heard of it as a way to get around the Great Firewall of China. The bad news for us PowerPC users is the browser bundle TOR offers, a specialized version of Firefox bundled with other utilities that you just start up and run, is Intel only. The good news is they offer a "Vidalia Bundle" without the browser (you configure your preexisting browser) that works on PPC and Tiger here. If you're insane you can also compile it.
Vidalia is the name of the GUI utility to set up TOR on your computer, and it's pretty straightforward. The only glitch I saw was there's no dock icon like they said there'd be, only a menubar icon. Maybe a Tiger bug. The only difficult thing in setup was knowing which proxy settings to change in your web browser,
I thought performance was pretty good. I'd heard the TOR network was slow as a snail, but that wasn't my experience. Web surfing was a little sluggish, but not too much. Now, it's important to note here that the TOR network does have its limitations. It wasn't made for filesharing, so using it to download torrents is considered a douche move that only slows the network for others. If you want to download TV shows or whatever anonymously, use torrents with a VPN or get a usenet account with SSL support, but let's leave TOR to non-filesharing activities like leaking sensitive documents, mmkay?
On a semi-related note, there's a program out in the wild called Reaver that uses a WPS vulnerability in your wireless router to snatch your WPA and WPA2 passwords. This is not a privacy enhancing program. The solution is to disable WPS in your router, but on many if not all Linksys and Cisco routers, you can't do it. And Netgear users report problems, too. So ultimately you'll have to replace your manufacturer's firmware with open source firmware like DD-WRT which doesn't support WPS.
That was mildly depressing.
UPDATE: TOR developers have reported a previously unknown security vulnerability that could expose your IP address if you use websocket connections in Firefox. They've updated their browser bundles with a bugfix, but not the Vidalia bundle for PPC. I couldn't figure out if the bug applies to just the browser bundle users or to all others who are using external browsers (puzzlingly, TOR has no support forums), so I guess the safest thing is to disable websockets in TenFourFox by changing
network.websocket.enabled to false in about:config and restarting TenFourFox.
Sunday, January 22, 2012
Viewing Youtube in Mac OS 9
As long as we're talking about OS 9, Dr. Dave alerted me to a couple of Japanese-authored apps for viewing Youtube and flv files in 9.2.2 (I didn't test these in earlier systems). The instructions and interface are written in Japanese, so it's a little confusing if you don't speak it, but I managed to more or less work it out.
They're called YTBrowser9 and FLVPlayer9. You also need a Flash browser plug-in, the one I tested with was version 7.
For YTBrowser9, after downloading and unpacking double click on it and it'll ask which browser you're using. Since I'm using Classilla, I clicked on Mozilla. Then, when you click through a couple of other boxes in Japanese and click cancel when it asks you to enter a Youtube url, Classilla should open up a welcome screen, again in Japanese. Find a link on that page that goes to an index file. Once you've found the index, you should see a red bar at the top with links to search, preferences, history, and a few others. Click on search, enter a search phrase, and then once you see a video you want to watch, copy its link, then navigate back to the index and click "?? URL" (its full url is "ytbb://www.youtube.com/dialog") and paste your link. Then you should see something like this:

Notice the download button. You need javascript enabled to use it with "Save Link Target As..." for downloading.
To make YTBrowser9 easier to use, I added bookmarks for the search and enter URL links. I'm not sure if this is exactly how you're supposed to use it, but that happens when your Japanese is as rusty as mine, har.
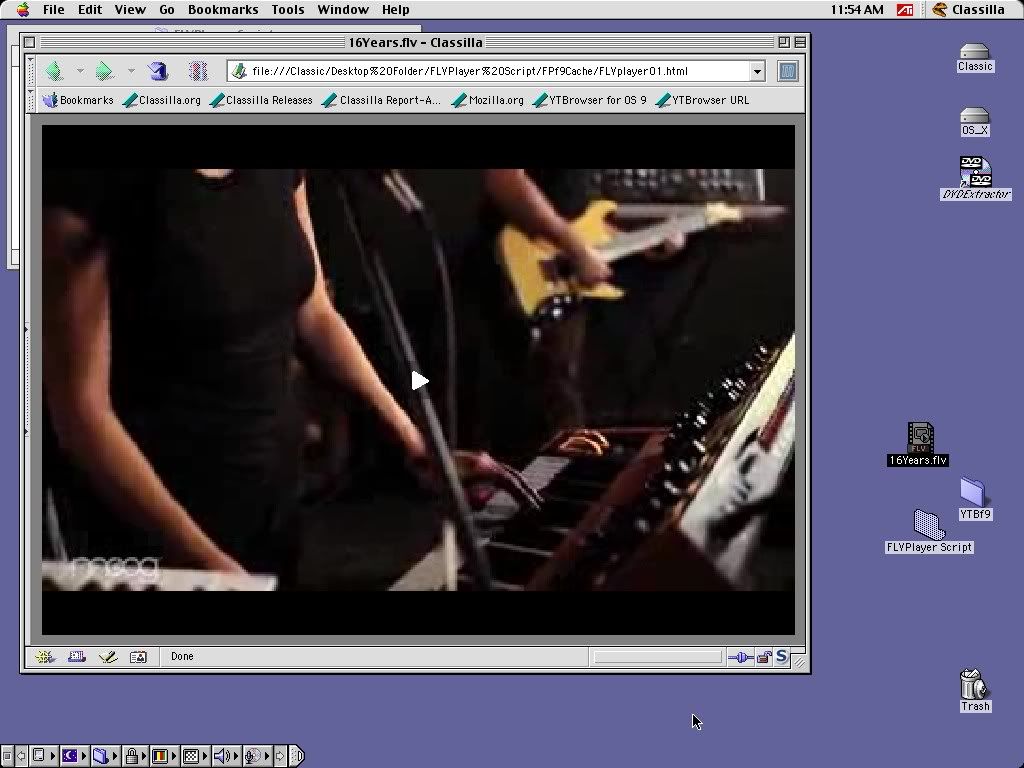
As for FLVPlayer9, it apears to be a simple drag and drop application. Just take a saved FLV file and drop it over the app, then it'll open it in a web browser window.

One final note, I notice the most recent version of Classilla defaults to a site's mobile page by setting its user agent to a Nokia mobile device. Really cool move. Makes Youtube and other sites zip. Though you can change it back to "normal" on a site-by-site basis via cookies, or globally by changing the user agent.
UPDATE: It looks like YTBrowser9 is similar to MacTubes in that you have to downlaod a new version whenever Youtube changes something in their url protocol.
They're called YTBrowser9 and FLVPlayer9. You also need a Flash browser plug-in, the one I tested with was version 7.
For YTBrowser9, after downloading and unpacking double click on it and it'll ask which browser you're using. Since I'm using Classilla, I clicked on Mozilla. Then, when you click through a couple of other boxes in Japanese and click cancel when it asks you to enter a Youtube url, Classilla should open up a welcome screen, again in Japanese. Find a link on that page that goes to an index file. Once you've found the index, you should see a red bar at the top with links to search, preferences, history, and a few others. Click on search, enter a search phrase, and then once you see a video you want to watch, copy its link, then navigate back to the index and click "?? URL" (its full url is "ytbb://www.youtube.com/dialog") and paste your link. Then you should see something like this:

Notice the download button. You need javascript enabled to use it with "Save Link Target As..." for downloading.
To make YTBrowser9 easier to use, I added bookmarks for the search and enter URL links. I'm not sure if this is exactly how you're supposed to use it, but that happens when your Japanese is as rusty as mine, har.
As for FLVPlayer9, it apears to be a simple drag and drop application. Just take a saved FLV file and drop it over the app, then it'll open it in a web browser window.
One final note, I notice the most recent version of Classilla defaults to a site's mobile page by setting its user agent to a Nokia mobile device. Really cool move. Makes Youtube and other sites zip. Though you can change it back to "normal" on a site-by-site basis via cookies, or globally by changing the user agent.
UPDATE: It looks like YTBrowser9 is similar to MacTubes in that you have to downlaod a new version whenever Youtube changes something in their url protocol.
Wednesday, January 18, 2012
Copy a Bootable Mac OS 9 Install Disc
So with the recent turning of the calendar, I looked at my Tiger and OS 9 install discs and it occurred to me they're getting on in years and very far from invincible. Time to make backups, I thought. So I fired up my burning app of choice, Burn.app, and made quick copies thinking I was done. Unfortunately I got a nasty surprise when I went to boot my iBook with the OS 9 copy to fix Debian's notorious disappearing partitions bug and found it unbootable. The Tiger DVD copy booted fine. It was only the OS 9 CD that was blurgged.
Okay, I thought, there's something wrong with the way Burn copies OS 9 discs. I'll just fire up Disk Utility and do it that way. One burned disc later and, crap, that won't boot either. So after googling this a bit and filtering out forum posts responding to questions saying, "Google it!" it appears the only way to burn a bootable OS 9 disc is with Toast. I tried it with my ancient copy of Toast 4.1.1 (that was a good year) which still runs in 9.2.2 and can confirm it works. The procedure is simple. It just takes a quick read through of the documentation to get it. I did not investigate whether you can do this with an OS X copy of Toast.
I'm still a bit clueless as to why the earlier copies were unbootable. They both had the correct file systems and had the hidden Trash and Desktop Folders. So I don't know.
This vexes me. I'm terribly vexed.
Okay, I thought, there's something wrong with the way Burn copies OS 9 discs. I'll just fire up Disk Utility and do it that way. One burned disc later and, crap, that won't boot either. So after googling this a bit and filtering out forum posts responding to questions saying, "Google it!" it appears the only way to burn a bootable OS 9 disc is with Toast. I tried it with my ancient copy of Toast 4.1.1 (that was a good year) which still runs in 9.2.2 and can confirm it works. The procedure is simple. It just takes a quick read through of the documentation to get it. I did not investigate whether you can do this with an OS X copy of Toast.
I'm still a bit clueless as to why the earlier copies were unbootable. They both had the correct file systems and had the hidden Trash and Desktop Folders. So I don't know.
This vexes me. I'm terribly vexed.
Wednesday, January 11, 2012
Note to Forum Posters
Dear Forum Posters,
When you respond to someone's support question by telling them to google it, my google searches end up at your posts. Please stop.
Sincerely,
Dan at ppcluddite.blogspot.com
When you respond to someone's support question by telling them to google it, my google searches end up at your posts. Please stop.
Sincerely,
Dan at ppcluddite.blogspot.com
Subscribe to:
Posts (Atom)